


When it comes to capturing stunning photos with your iPhone, one of the key elements you need to master is adjusting the focus and exposure. These two factors can make a significant difference in the clarity and quality of your photos. Thankfully, with the latest iPhone models, you have a wide range of tools and options at your disposal to help you achieve the perfect shot.
First, let’s talk about adjusting the focus. The focus determines which part of the image appears sharp and in focus, while the rest may appear blurry or out of focus. To adjust the focus on your iPhone, simply tap on the screen where you want the focus to be. The camera will then adjust its focus accordingly, and you will see a yellow box indicating the selected focus point. This feature is especially useful when you have a specific subject you want to highlight in your photo.
Next, let’s move on to adjusting the exposure. Exposure refers to how light or dark an image appears. It’s crucial to get the exposure right, as photos that are too dark or too bright can ruin an otherwise perfect shot. On your iPhone, you can adjust the exposure by using the brightness slider that appears next to the focus box. Simply swipe up or down on the screen to increase or decrease the exposure, respectively. Make sure to find the right balance and avoid over or underexposing your photos.
By masterfully adjusting the focus and exposure on your iPhone, you can capture clearer and more visually striking photos. Remember to experiment and take your time to find the perfect settings for each shot. With practice, you’ll be able to create stunning images that truly showcase your artistic vision. So grab your iPhone, start applying these step-by-step instructions, and watch your photography skills soar to new heights!
Adjusting Focus
To take clearer photos with your top-of-the-line iPhone, it is important to adjust the focus properly. Follow this step-by-step guide to ensure your photos are sharp and in focus:
- Launch the Camera app on your iPhone.
- Tap on the screen where you want to adjust the focus. This will bring that area into focus.
- If you want to lock the focus, simply press and hold on the screen until you see the AE/AF Lock indicator appear.
- To release the focus lock, tap anywhere on the screen or just simply close the Camera app.
- If you want to manually adjust the focus, you can use the manual focus feature in certain third-party camera apps.
By adjusting the focus correctly, you can ensure that the subject of your photo is sharp and in focus, resulting in clearer and professional-looking photos.
Open the Camera App

To start adjusting the focus and exposure on your iPhone for clearer photos, you’ll first need to open the Camera app. This step-by-step guide will walk you through the process.
To open the Camera app, locate the icon on the home screen of your iPhone. The Camera app icon looks like a small camera lens. Tap on the icon to launch the app.
Once the Camera app is open, you are ready to begin adjusting the focus and exposure settings to capture clearer photos with your iPhone.
Note: The steps mentioned in this guide are for iPhones running the latest version of iOS. Older versions of iOS may have slightly different steps, but the overall process should remain similar.
Now that you have opened the Camera app, let’s move on to the next step in the guide to adjusting the focus and exposure on top of your iPhone for clearer photos.
Tap on the Screen to Set the Focus Point
As mentioned in the step-by-step guide to adjusting focus and exposure on top of iPhone for clearer photos, one of the key steps is to tap on the screen to set the focus point. This allows you to have more control over the focus of your photos.
When you tap on the screen, the iPhone camera will automatically adjust the focus point based on where you tapped. This is particularly useful when you want to highlight a specific subject in your photos.
To tap on the screen to set the focus point, follow these steps:
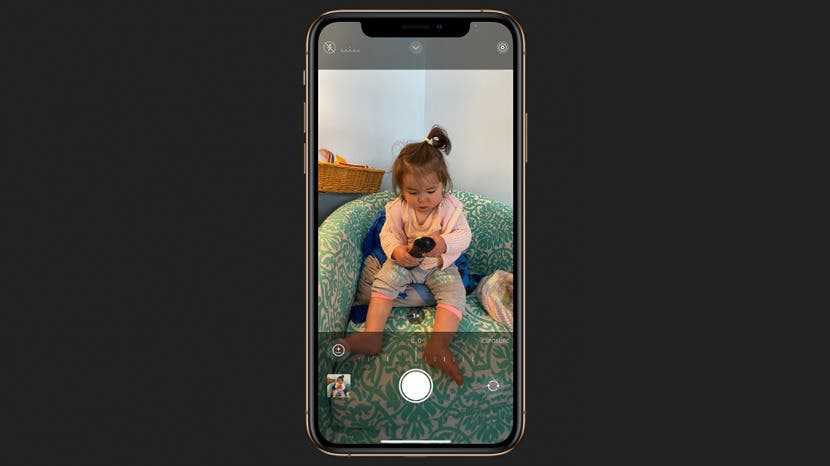
- Open the camera app on your iPhone and frame your shot.
- Look for the subject you want to focus on and tap on it on the screen.
- The iPhone camera will adjust the focus point to the area you tapped, making it sharper and clearer in the final photo.
When setting the focus point, you can also adjust the exposure by swiping up or down on the screen. Swiping up will make the photo brighter, while swiping down will make it darker.
By tapping on the screen to set the focus point, you can ensure that the subject you want to highlight is in sharp focus, leading to clearer and more professional-looking photos on your iPhone.
Adjust the Focus by Moving Your Finger Up or Down on the Screen
To capture clearer photos on your iPhone, mastering the art of adjusting focus is crucial. The focus determines the sharpness and clarity of the subject in your photo. Luckily, the iPhone provides a simple and intuitive way to adjust the focus manually using just your fingertips.
When you open the camera app on your iPhone, you’ll see a small square or rectangle on the screen. This is the autofocus frame, and it automatically determines the focus based on what it detects as the subject. However, there may be times when you want to adjust the focus manually to ensure that a specific area is sharp and in focus.
To do this, follow these steps:
- Launch the camera app on your iPhone and frame your shot.
- Once you have your subject in the frame, tap and hold on the screen.
- A yellow square or rectangle will appear, indicating the focus point.
- While still holding your finger on the screen, move it up or down to adjust the focus.
- As you move your finger up or down, you’ll notice that the focus point changes, allowing you to focus on different parts of the scene.
- Keep adjusting the focus until the desired area is sharp and in focus.
- Once you’re satisfied with the focus, release your finger from the screen.
By adjusting the focus manually, you have more control over the sharpness and clarity of your photos. This is especially useful when capturing macro shots or when you want to emphasize a particular detail in your composition.
Experiment with different focus points and find the right balance for your photos. The more you practice adjusting the focus, the more comfortable and skilled you’ll become at capturing clear and professional-looking images with your iPhone.
Adjusting Exposure
When taking photos on your iPhone, it’s important to adjust the exposure to ensure that your images are clear and well lit. Follow this step-by-step guide to adjust the exposure on your iPhone and capture clearer photos:
- Open the Camera app on your iPhone and select the desired mode (such as Photo or Portrait).
- Tap on the screen to activate the focus and exposure lock.
- A yellow square will appear indicating the focus and exposure area. Drag your finger up or down to adjust the exposure level.
- As you drag your finger up, the exposure level will increase, making the image brighter. Dragging your finger down will decrease the exposure level, making the image darker.
- Find the right exposure level by experimenting with different adjustments until the desired brightness is achieved.
- Once you’re satisfied with the exposure level, you can capture the photo by pressing the shutter button or volume up button.
By adjusting the exposure on your iPhone, you can ensure that your photos are properly exposed and have the right lighting. This will result in clearer and more vibrant images.
Open the Camera App
Before you start adjusting the focus and exposure settings on your iPhone, you need to open the Camera app. This app is typically located on the home screen of your iPhone and is represented by a camera icon. Simply tap on the Camera app to launch it.
Once the Camera app is open, you can begin adjusting the focus and exposure settings to capture clearer photos. The Camera app provides you with a step-by-step guide on how to do this, making it easy even for beginners.
By adjusting the focus, you can make sure that the main subject of your photo is sharp and clear. The focus can be adjusted by tapping on the screen where you want to focus. Simply tap on the subject to set the focus.
The exposure settings control the amount of light that enters the camera, affecting the brightness of your photos. You can adjust the exposure by swiping up or down on the screen. Swiping up will increase the exposure, making the photo brighter, while swiping down will decrease the exposure, making the photo darker.
Using the step-by-step guide provided by the Camera app, you can easily adjust the focus and exposure settings on the top of your iPhone to capture clearer and more professional-looking photos.
How do I adjust the focus on my iPhone camera?
To adjust the focus on your iPhone camera, open the Camera app and find your subject. Tap on the screen where your subject is located, and you will see a yellow box appear around it. This means that the camera has focused on that area. You can also adjust the focus manually by tapping and holding on the screen until you see the yellow box pulsing. Then, drag your finger up or down to adjust the focus.
What should I do if my iPhone camera keeps focusing on the wrong area?
If your iPhone camera keeps focusing on the wrong area, you can try tapping on the screen to manually adjust the focus. Make sure your subject is in the frame, then tap on it to focus on that area. If the camera still has trouble focusing correctly, you can try locking the focus by tapping and holding on the screen until you see the yellow box pulsing. Then, slide your finger to the right to lock the focus in place.
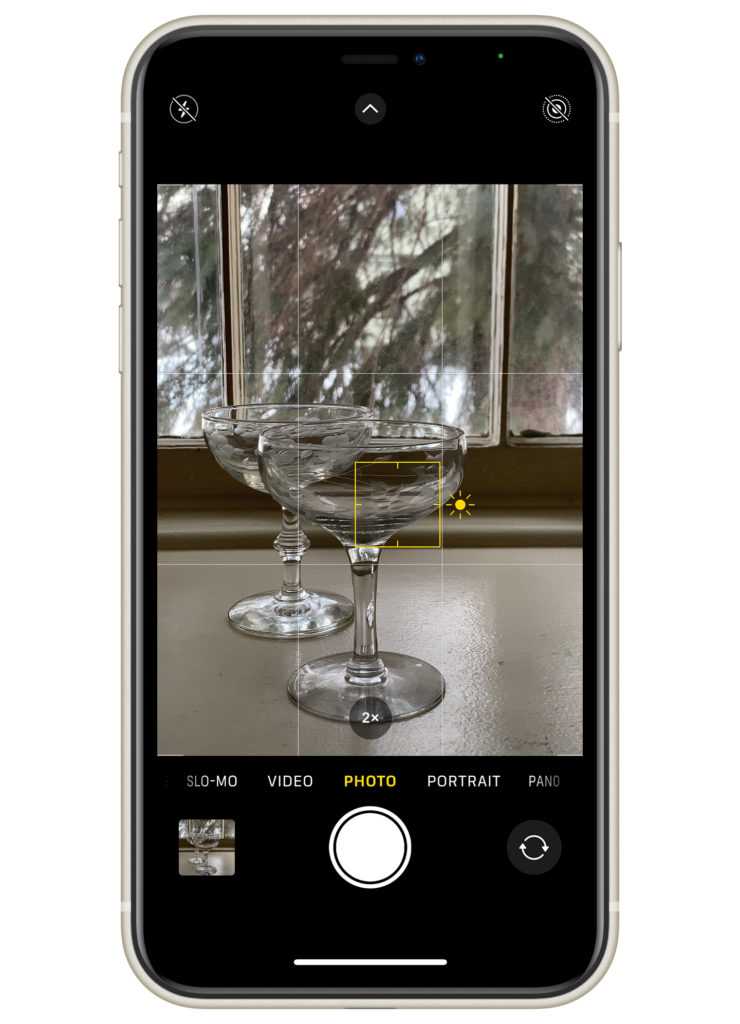
How can I adjust the exposure on my iPhone camera for better photos?
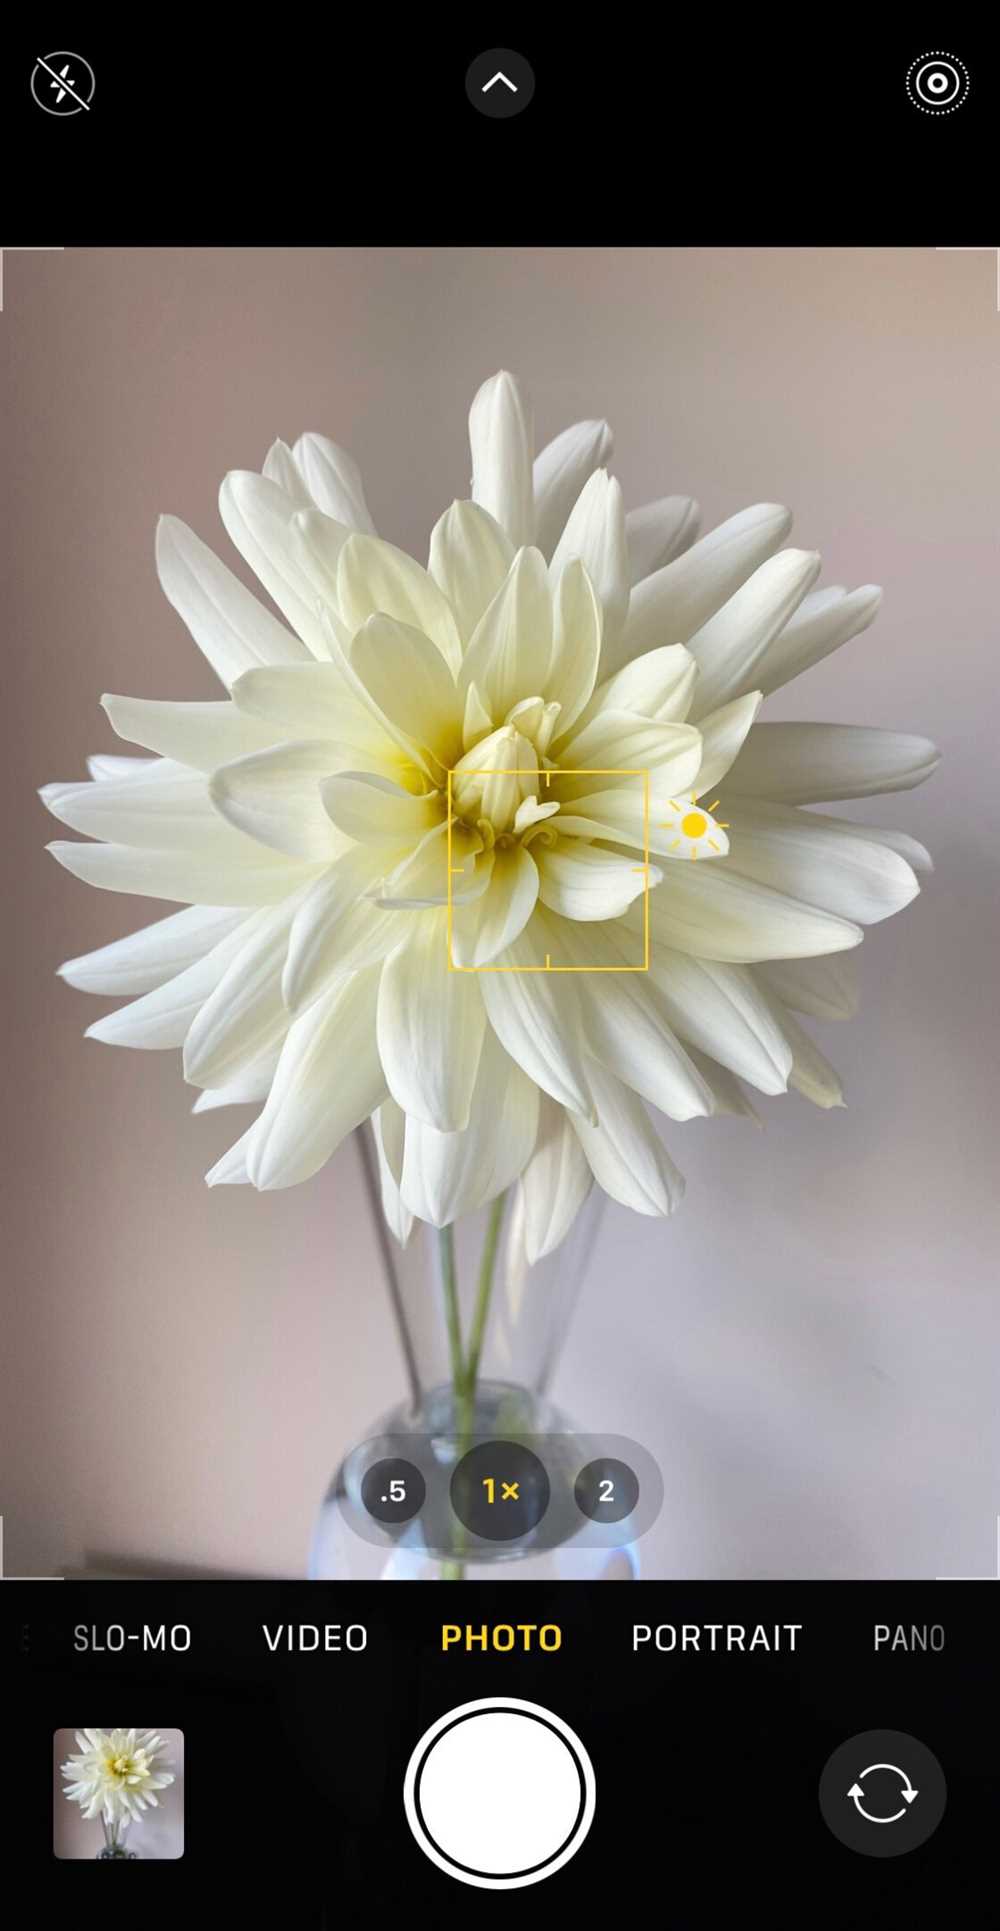
To adjust the exposure on your iPhone camera, open the Camera app and find your subject. Tap on the screen where your subject is located, and you will see a yellow box appear around it. Once the focus is locked, you will notice a sun icon next to the yellow box. To adjust the exposure, simply slide your finger up or down on the screen. Sliding up will make the image brighter, while sliding down will make it darker. Experiment with different exposures to find the right balance for your photo.


+ There are no comments
Add yours