


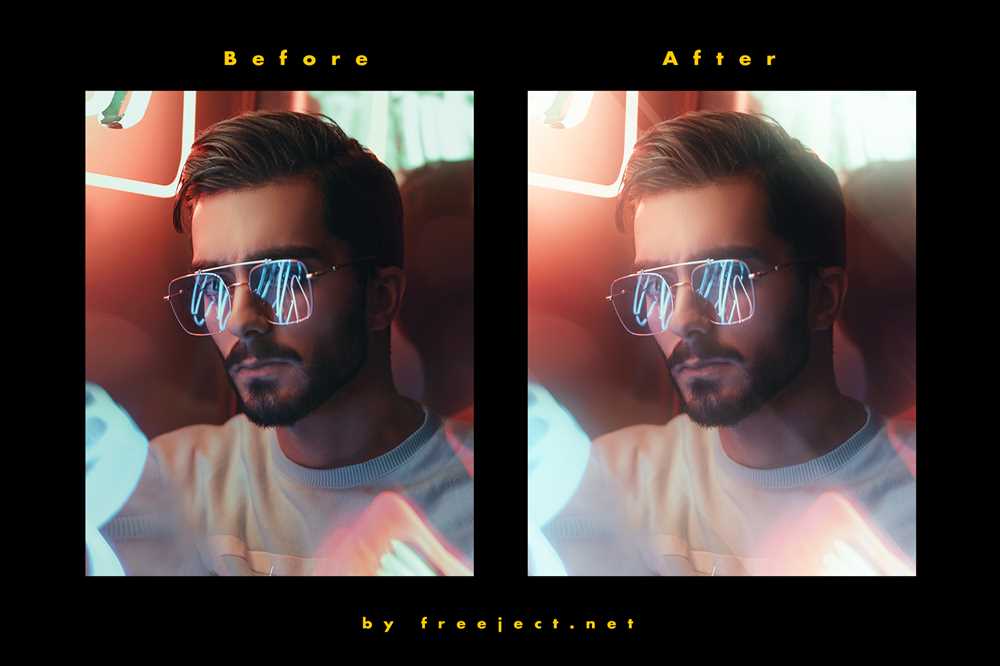
Blurry images have a certain charm to them, evoking a dreamlike atmosphere that can captivate viewers. One way to achieve this effect is by selectively blurring the eyes in photos. Blurring the eyes can add a touch of mystery and intrigue to your images, creating a visually stunning result.
To blur the eyes in photos, you don’t need to be an expert in photo editing software. With a few simple steps, you can transform the eyes in your pictures and give them a dreamy, ethereal appearance.
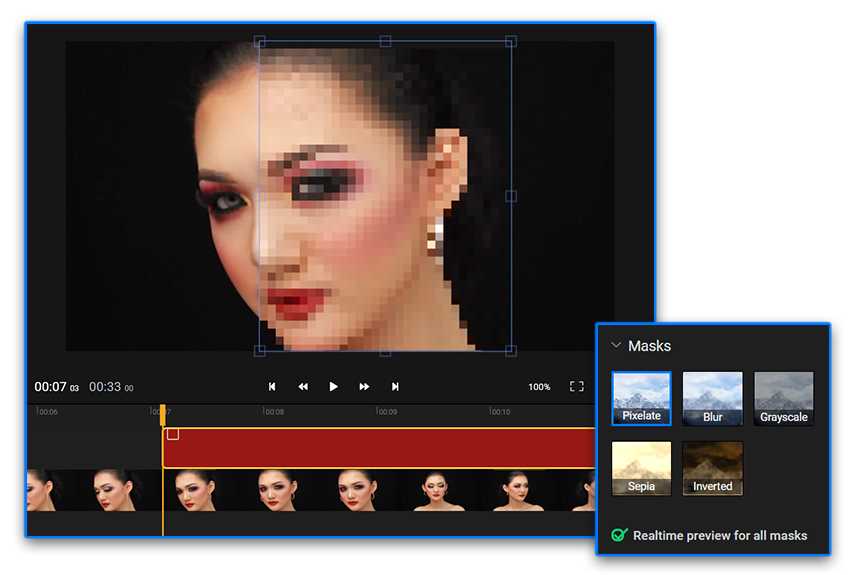
First, choose the image you want to work with and open it in your preferred photo editing program. Then, using either a brush or a selection tool, select the eyes in the photo. It’s important to be precise during this step to ensure that only the eyes are blurred.
Next, apply a blur effect to the selected area. There are various tools and techniques you can use to achieve the desired blur effect. Experiment with different levels of blurring until you are satisfied with the result. Keep in mind that you want the eyes to appear soft and slightly out of focus, but still recognizable.
The Importance of Eye Blur in Photography
Creating a dreamy effect in photography is all about the details, and one of the most important details to consider is the blurring of the eyes. By strategically blurring the eyes in a photo, photographers can draw attention to other key aspects of the image, such as the subject’s facial expression or the overall mood of the scene.
The eyes are often referred to as the windows to the soul, and capturing their beauty and emotion is essential in portrait photography. However, in certain cases, sharp and clear eyes may distract from the intended focal point or mood. This is where the art of eye blur comes into play.
By deliberately blurring the eyes, photographers can create a sense of mystery and allure, adding depth and interest to the image. This technique can be particularly effective in portrait photography, fashion shoots, and artistic compositions.
When blurring the eyes, it’s important to strike a balance between creating the desired effect and retaining a natural appearance. Too much blurring can make the subject appear unnatural or even eerie, while too little may not achieve the intended dreamy effect.
There are various methods and tools available for achieving eye blur in photography. Some photographers use advanced editing software to selectively blur the eyes, while others prefer to capture the effect in-camera using techniques like shallow depth of field or intentional camera movement.
| Advantages of eye blur in photography: |
|
In conclusion, the importance of eye blur in photography cannot be overstated. By carefully controlling the level of blur and strategically placing the focal point elsewhere, photographers can create captivating and visually stunning images that convey a dreamy and ethereal quality.
Enhancing the Emotional Impact
By creating a blur effect on the eyes in photos, you can enhance the emotional impact of the image. The eyes are often considered the window to the soul, and by adding a dreamy blur to them, you can evoke a sense of mystery and depth.
Blurring the eyes in photos is a simple technique that can be done with the right editing tools. The blur effect softens the sharpness of the eyes, making them appear more ethereal and dreamlike. This can be especially effective in portrait photography, as it adds a sense of intrigue and captivates the viewer.
Wondering how to blur eyes in photos? It’s relatively simple. Start by opening your photo in a photo editing software like Adobe Photoshop or Lightroom. Select the area around the eyes using the appropriate selection tool. Then, apply a blur filter or effect to the selected area. Adjust the intensity of the blur to achieve the desired dreamy effect.
To further enhance the emotional impact, consider adding a vignette effect or adjusting the contrast and saturation levels. These subtle changes can help create a more dramatic and captivating image.
Remember, the key to creating a dreamy effect and enhancing the emotional impact lies in the careful balance of blurring the eyes and maintaining the overall focus of the photo. The blurred eyes should draw the viewer’s attention while still allowing them to connect with the subject.
So, the next time you want to add an extra touch of emotion and mystery to your photos, try experimenting with blurring the eyes. You may be surprised at the powerful impact it can have!
Adding a Sense of Mystery

Another way to enhance the dreamy effect in your photos is to add a sense of mystery by blurring the eyes. Blurring the eyes can create a captivating and ethereal look that draws the viewer’s attention to other elements of the photo. This technique is particularly effective for portrait photos, as it adds an element of intrigue and allows the viewer to interpret and imagine the subject’s emotions.
To blur the eyes in your photos, you can use photo editing software such as Adobe Photoshop or GIMP. These tools provide various methods to achieve the desired effect, such as using the blur tool or applying a blur filter. It’s important to use a gentle touch when blurring the eyes to maintain a natural appearance.
The blurred eyes can contribute to the dreamy effect by creating a soft and mysterious atmosphere. This effect can be further enhanced by adjusting the overall lighting and colors of the photo. Experimenting with different levels of blur and opacity can help you achieve the desired dreamy and mysterious look.
Remember, adding a sense of mystery through blurred eyes is just one way to create a dreamy effect in your photos. Experimenting with different techniques and styles can help you develop your own unique style and create captivating and mesmerizing images.
Tools and Techniques for Blurring Eyes
Creating a dreamy effect by blurring eyes in photos can add a touch of mystery and intrigue to your images. The eyes are often referred to as “the window to the soul,” and by blurring them, you can create a sense of depth or a dream-like quality.
When it comes to blurring eyes in photos, there are several tools and techniques you can use. One popular tool is Adobe Photoshop, which offers a variety of blur filters that can be applied to just the eyes or the entire image.
To blur eyes in Photoshop, you can use the “Gaussian Blur” filter. This filter allows you to adjust the radius of the blur, giving you control over the intensity of the effect. You can also selectively apply the blur effect using layer masks, allowing you to blur only certain parts of the eyes while keeping other areas sharp.
Another technique to blur eyes is to use a lens filter like a soft-focus filter. These filters can create a dreamy and hazy effect by diffusing light and softening the details in the image. You can attach these filters to your camera lens before taking the photo to achieve the desired blurring effect.
Alternatively, if you don’t have access to editing software or lens filters, you can create a similar effect by adjusting the focus manually. By intentionally focusing on a different area of the image, such as the background or a nearby object, the eyes will appear slightly blurred when compared to the rest of the photo.
It’s important to note that when blurring eyes in photos, it’s essential to respect the subject’s privacy and consider their consent. Always communicate with your subjects and obtain permission before altering their images in any way.
Experimenting with different tools and techniques for blurring eyes can provide you with creative options to enhance your photos and add a dreamy effect. Whether using Photoshop, lens filters, or manual focus adjustment, remember to use these techniques responsibly and ethically.
Using Gaussian Blur in Photoshop

When it comes to creating a dreamy effect and blurring eyes in photos, one of the best tools to use is the Gaussian Blur filter in Photoshop. This filter allows you to achieve a soft and dreamlike look by blurring specific areas of an image.
To apply the Gaussian Blur effect in Photoshop, follow these simple steps:
- Open your image in Photoshop
- Select the area of the eyes that you want to blur using any selection tool
- Go to the “Filter” menu and choose “Blur” and then “Gaussian Blur”
- Adjust the radius in the dialog box to control the amount of blur
- Preview the effect and click “OK” to apply the blur
Experiment with different radius values to find the perfect level of blur for your desired dreamy effect. Remember, the goal is to create a soft and subtle blur that adds a dreamy and ethereal quality to the eyes in your photos.
Using Gaussian Blur in Photoshop is an effective technique for creating a dreamy effect and blurring eyes in photos. It allows you to enhance the beauty and emotion in your images by adding a touch of softness and surrealism.
Applying the Iris Blur Filter in Lightroom

To create a dreamy effect and blur the eyes in photos, one effective technique is to use the Iris Blur Filter in Adobe Lightroom. This filter allows you to selectively blur specific parts of your image, creating a beautifully soft and dreamy look.
Here are the steps to apply the Iris Blur Filter in Lightroom:
| Step | Description |
|---|---|
| 1 | Open your photo in Lightroom and switch to the Develop module. |
| 2 | Select the Adjustment Brush tool from the toolbar on the right-hand side. |
| 3 | Ensure the Brush panel is open and set the Size and Feather values according to the size and intensity of the desired blur effect. |
| 4 | Enable the Auto Mask checkbox in the Brush panel to ensure accurate selection around the eyes. |
| 5 | Position the brush over one eye and carefully paint over the iris and the surrounding area. Repeat the same process for the other eye. |
| 6 | Once the desired areas are selected, go to the Effects panel and find the Iris Blur Filter. |
| 7 | Adjust the Amount and Transition sliders to control the level of blur and the smoothness of the transition between the blurred and sharp areas. |
| 8 | Preview the effect and make any necessary adjustments to achieve the desired dreamy look. |
| 9 | Click Done to apply the Iris Blur Filter and save your edited photo. |
By following these steps and experimenting with different settings, you can easily create a dreamy and ethereal effect by blurring the eyes in your photos using the Iris Blur Filter in Lightroom.
Utilizing the Lens Blur Effect in GIMP
When it comes to creating a dreamy effect in photos, one of the best tools to use is the lens blur effect. This effect allows you to blur specific areas of the image, such as the eyes, while keeping the rest of the photo sharp. In this article, we will go over how to achieve this effect using GIMP, a free and powerful photo editing software.
To start, open GIMP and load the photo that you want to apply the lens blur effect to. Make sure that the photo is in a format that GIMP can read, such as JPEG or PNG.
Once your photo is loaded, select the “Filters” option from the top menu and navigate to the “Blur” submenu. Here, you will find several different blur options, but for a dreamy effect, we recommend using the “Lens Blur” filter.
The “Lens Blur” filter in GIMP allows you to customize the blur effect by adjusting parameters such as the radius, shape, and rotation. A larger radius will create a stronger blur, while a smaller radius will result in a more subtle effect. Experiment with different values to find the desired look.
To apply the lens blur effect to the eyes in the photo, create a selection around the eyes using the selection tools available in GIMP. Once the eyes are selected, go to the “Filters” menu again and choose “Blur” followed by “Lens Blur”. This will apply the lens blur effect to the selected area only.
After applying the lens blur effect, you can further enhance the dreamy look by adjusting the opacity of the blurred layer or by adding additional effects such as vignetting or soft focus.
Finally, save your edited photo by selecting the “File” option from the top menu and choosing “Export As”. Select a destination folder and specify the format and quality settings for the exported image. Then, click “Export” to save your dreamy, blurred eye photo.
| Utilizing the Lens Blur Effect in GIMP |
| 1. Open GIMP and load the photo you want to edit. |
| 2. Go to “Filters” > “Blur” > “Lens Blur”. |
| 3. Adjust the radius, shape, and rotation parameters. |
| 4. Create a selection around the eyes. |
| 5. Go to “Filters” > “Blur” > “Lens Blur” again. |
| 6. Adjust the opacity and add additional effects if desired. |
| 7. Save your edited photo. |
What does it mean to blur eyes in photos?
Blurring eyes in photos is a technique used to create a dreamy or ethereal effect. It involves selectively softening or blurring the area around the eyes while keeping the rest of the photo in focus.
Can blurring eyes in photos enhance the overall composition?
Absolutely! Blurring the eyes in photos can help draw attention to other elements in the image, such as the background or the subject’s facial expression. It can also add a sense of mystery or emotion to the photo.


+ There are no comments
Add yours